5 Non-Negotiables for Beginner Street Photographers
Beginner street photographers improve fastest when they stop relying on stealth or luck and build five habits instead: work openly and respectfully, learn a few streets deeply, read light before chasing subjects, simplify chaos through composition, and edit hard enough that the picture becomes clear.
TL;DR
Work openly and respectfully instead of building your practice around deception.
Return to the same streets until you can predict where people, light, and backgrounds align.
Look for useful light first; it often matters more than finding more subjects.
Use composition to control hierarchy, edges, and background clutter in busy scenes.
Editing is part of the craft: compare near-identical frames and keep only the clearest one.
Use public-domain or clearly licensed images carefully; do not assume every reusable source has identical rights.
The five non-negotiables for beginner street photographers are simple: do not build your practice around sneaking, walk the same streets until they stop feeling random, read the light before you chase subjects, use composition to organize public chaos, and edit ruthlessly afterward. Those habits are better supported than gear-driven shortcuts because strong photographs depend on ethical judgment and on decisions about frame, time, detail, and vantage point, not on luck alone.
Street photography often gets romanticized as courage, reflexes, and decisive luck. That is only part of the story. Beginners more often struggle because their method is unstable: they wander without understanding a place, react to any interesting person, ignore how light affects clarity, accept cluttered frames, and keep too many files that felt exciting in person but read weakly on screen. A better foundation is disciplined observation plus honest editing.
This article treats the five points as foundational disciplines rather than universal laws. Some claims here are documented directly, especially the ethical baseline from visual-journalism standards and the photographic framework that emphasizes frame, time, detail, and vantage point. Other recommendations, such as repeatedly walking the same route, are practical inferences from that framework and are presented that way.
Emmy Andriesse for Anefo — Public domain. Resized and compressed to WebP; visual content unchanged. Original image.
What are the five non-negotiables for beginner street photographers?
They are these: work openly and respectfully rather than relying on deception; revisit the same streets until you can predict where pictures may happen; study how light changes a scene before you chase action; simplify the street through hierarchy, spacing, and edge control; and treat editing as part of seeing, not as cleanup after the fact. Together, these habits address the most common beginner failures: ethical friction, random subject hunting, poor visual clarity, cluttered framing, and weak selection.
The logic behind all five is that street photography is not made strong by subject matter alone. A busy corner, a dramatic passerby, or a vivid sign may feel interesting in person, but the photograph still has to decide what stays inside the frame, what becomes dominant, what moment matters, and what detail gets excluded. That is why beginners usually improve faster by learning selection than by buying equipment.
Work openly, calmly, and ethically.
Learn one route deeply before chasing novelty.
Watch light patterns before you watch people.
Find structure first, then wait for life.
Edit harder than feels comfortable.
Non-negotiable | What it prevents | What it develops |
|---|---|---|
Open, respectful practice | Conflict driven by stealth and baiting | Confidence, ethics, steadier judgment |
Repeated walks | Random wandering | Prediction, timing, local familiarity |
Light awareness | Flat or unreadable scenes | Clearer hierarchy and subject separation |
Compositional structure | Chaotic frames | Control of attention and edges |
Hard editing | Too many weak near-misses | Selection, critique, consistency |
Why should beginners avoid building their practice around being sneaky?
Because deception is a weak foundation both ethically and practically. The clearest external support here comes from visual-journalism ethics, which emphasize accuracy, dignity, and responsible treatment of subjects. That does not create a universal street-photography law, and it does not mean every candid photograph is unethical. But it does support a serious recommendation for beginners: do not make trickery, humiliation, or avoidable harm your method.
Practically, stealth often teaches the wrong skill first. It pushes attention toward adrenaline, concealment, and fear of confrontation instead of toward light, background, spacing, and timing. A beginner who is mostly thinking about not being noticed is rarely thinking clearly about the frame. Working more openly tends to slow you down just enough to make better visual decisions.
This is an ethical recommendation, not a legal guide. Public-photography laws and publication rights vary by jurisdiction, and this article does not try to settle them. The safer beginner habit is simpler: stand in a way that is calm and defensible, avoid clearly humiliating or vulnerable situations unless there is a strong documentary reason, and disengage if someone objects. That approach will not solve every social situation, but it is sturdier than building your identity around getting away with things.
A visible method can still produce candid pictures. Many strong street photographs depend on ordinary public behavior unfolding naturally, not on permission requests before every frame. The point is not that all candid work is wrong. The point is that beginners are better served by respect, steadiness, and judgment than by concealment as a style.
Do not bait reactions for a photo.
Avoid photographing people in obviously degrading situations unless there is strong documentary justification.
If challenged, leave rather than escalating.
Learn local law separately before publication or commercial use.
Approach | Likely beginner result | Better alternative |
|---|---|---|
Sneaky shooting | Adrenaline, weak observation, avoidable conflict | Open camera use with situational awareness |
Provoking reactions | Theatrical but ethically weak pictures | Wait for real behavior and gestures |
Arguing on the street | Escalation and lost focus | Disengage and move on |
Assuming legality equals wisdom | Defensive habits | Use legal knowledge plus ethical restraint |

A public gathering with several people distributed across the frame. The scene is socially open rather than hidden, which suits the article's point that public photography starts with observing visible relationships, not with concealment. Emmy Andriesse for Anefo — Public domain. Resized and compressed to WebP; visual content unchanged. Original image.
How does walking the same streets repeatedly make better pictures more likely?
Because repeated walks turn a place from random scenery into a field of recurring possibilities. If photography depends on frame, time, detail, and vantage point, then familiarity helps you predict where those elements may align. You begin to notice where pedestrians pause, where traffic compresses, where shadows cut across the pavement, and where backgrounds briefly simplify. That is not a museum rule quoted directly from the sources; it is a practical inference from the documented framework.
Beginners often overvalue novelty. They keep moving because new streets feel promising, but unfamiliarity also overloads attention. When every storefront, sign, and passerby is new, it becomes harder to judge where to stand or when to wait. Repetition reduces that noise. You stop spending all your attention on orientation and start seeing patterns.
This habit also improves timing. If you know that people queue beside a bright wall at lunch, that cyclists pass a staircase every few minutes, or that reflections appear in one shop window late in the afternoon, you can prepare a frame before the event arrives. In street photography, that shift from reacting to predicting is one of the biggest steps toward consistency.
Repeated routes can also reveal your own preferences. Over time you may notice that you keep returning to compression, reflections, isolated figures, or small gestures against strong geometry. That does not instantly become a personal style, but it gives real evidence about the visual problems you are drawn to solve.
Choose one short route and work it repeatedly.
Note where people stop, cross, queue, or separate from the background.
Return at different times of day before deciding a place is unphotogenic.
Treat familiarity as a way to predict, not as a guarantee of results.
What repeated walks reveal | Why it matters | What to look for |
|---|---|---|
Pedestrian patterns | Helps with anticipation | Crossings, queues, pauses, bottlenecks |
Background quality | Improves separation | Clean walls, shadowed recesses, open sky |
Timing windows | Makes waiting smarter | Short bursts of activity at regular times |
Your own preferences | Builds consistency | Recurring framing and subject habits |
Why should you read the light before you chase subjects?
Because light determines legibility before it determines mood. It affects brightness, contrast, separation, and what the eye notices first. In street photography, that often matters more than the subject you are waiting for. A modest gesture in good light may produce a clearer picture than a dramatic gesture in flat or patchy light that never establishes hierarchy.
This is one place where it helps to separate optical fact from artistic judgment. The optical fact is straightforward: front light, side light, backlight, open shade, and hard broken sunlight produce different levels of contrast, texture, silhouette, and background separation. The artistic judgment comes later: whether one look feels gentle, harsh, cinematic, or tense depends on the image and on the viewer.
For beginners, a useful habit is to find useful light first and then wait for people to activate it. A bright patch on pavement, a wall catching side light, a doorway in open shade, or a backlit crossing can all provide structure before any subject appears. This usually leads to stronger pictures than wandering after every interesting face or outfit.
Good light does not always mean dramatic light. Open shade can produce quieter, less contrasty scenes that make facial detail easier to read. Hard midday light can be ugly in one location and brilliant in another if it creates clean silhouettes or isolates a figure against darkness. The question is not whether the light is objectively beautiful. The question is what it lets the frame say clearly.
Look for light pools, shadow lines, and reflective surfaces before looking for subjects.
Use side light for shape and texture when the background is controlled.
Use backlight for silhouette and separation when subject outlines stay readable.
Treat patchy hard light cautiously unless it creates a clear visual structure.
Light situation | Optical effect | Common street use |
|---|---|---|
Front light | Clear detail, lower shadow drama | Readable faces and descriptive scenes |
Side light | Stronger shape and texture | Figures against walls, textured streets |
Backlight | Silhouette, rim light, separation | Crossings, umbrellas, outlines, haze |
Open shade | Softer contrast | Quieter scenes and easier tonal control |

Strong sunlight strikes the road and walls unevenly, while the person with the wheelbarrow remains small within a large bright environment. The picture usefully shows how light creates graphic structure before subject drama does. Emmy Andriesse for Anefo — Public domain. Resized and compressed to WebP; visual content unchanged. Original image.
How do you use composition to organize the chaos of the street?
By treating composition as control of attention, not as rule-following. Busy streets do not become compelling just because they contain many things. The photograph has to decide what matters first, what supports it, and what should be excluded. The strongest support here comes from the idea that frame, detail, time, and vantage point are core photographic problems, combined with practical guidance from Miru's composition articles on hierarchy, line, rhythm, balance, and edge control.
A useful street-photography principle is: find structure first, then wait for life to complete it. Structure might be a window grid, a bright opening between darker surfaces, a repeated row of figures, a stair rail, a band of shadow, or a clean background that can receive a passerby. Life is the moment when a gesture, spacing change, or single person activates that structure. This is not a universal law, but it is one of the most reliable ways to make crowded scenes coherent.
Lines matter, but not merely as leading devices. They can divide zones, hold the frame together, add pressure near edges, or keep the eye circulating inside the image. Repetition matters too, but rhythm becomes effective when repetition includes variation or interruption. A lone figure breaking a row, a bright coat among muted tones, or a pause in a dense crowd can all create a legible pattern.
Edge control is especially important on the street because clutter often enters from the borders. A bright sliver, clipped limb, merging sign, or awkward half-person at the edge can weaken an otherwise good frame. Many compositional improvements come not from changing focal length but from taking one step left or right, lowering the camera slightly, or waiting for cleaner spacing between subject and background.
Examples from well-known street images are most useful when treated as visual reasoning rather than recipe cards. Miru's reading of Joel Meyerowitz emphasizes how a street can become a stage when perspective and lighting hold a human gesture in place. Its analysis of Marc Riboud's window-framed scene shows how a grid can organize scattered activity into readable compartments. The Saul Leiter comparison highlights how one color accent can carry hierarchy, and the Ketaki Sheth analysis shows how bright robes against a darker entry create immediate focal clarity. These are interpretive lessons, not proofs that every good street photograph must work the same way.
Ask what the eye notices first, second, and third.
Use background separation before you rely on dramatic subjects.
Scan the edges before you press the shutter.
Move your position before blaming the lens or scene.
Wait for gesture or spacing to complete an already promising frame.
Compositional problem | What it looks like | Typical fix |
|---|---|---|
No clear subject | Eye jumps between equal distractions | Simplify, wait, or move for cleaner hierarchy |
Background merger | Subject blends into wall, sign, or crowd | Change angle or timing for separation |
Weak edges | Bright sliver or clipped figure distracts | Reframe or crop more decisively |
Busy but empty frame | Lots happening, nothing resolves | Find a structure and wait for the right event |
Why is editing part of street photography rather than cleanup afterward?
Because street photography is a medium of selection twice: once in the field and again during review. Many photographs that felt exciting when made turn out to be vague, cluttered, or a fraction too early or late. Editing is where those small but decisive differences become visible. That is why comparing adjacent frames is one of the fastest ways to improve.
Selection is the strongest supported meaning of editing here. Post-processing can help, but it should usually serve clarity rather than overwhelm the image. A modest crop, a small reduction of distracting highlights, or a contrast adjustment that makes the main subject read more clearly can be useful. Heavy processing may be a creative choice, but it is not the main lesson supported by the evidence behind this article.
Reviewing near-identical frames teaches you what actually changed. One version may have a cleaner hand gesture, a more readable face, better spacing between two figures, a shadow that no longer cuts awkwardly through the subject, or an edge that stopped leaking attention. Those are exactly the differences beginners tend to miss until they compare images side by side.
Hard editing also protects you from sentimental attachment to the experience of shooting. A photograph should not be kept only because the encounter was exciting, awkward, or courageous to make. Keep it because the image itself directs attention clearly and holds together as a picture.
Review bursts and neighboring frames together.
Reject images whose subject was interesting but never became clear in the frame.
Use cropping and tonal adjustments to clarify, not to disguise weak seeing.
Write one sentence about why the winner beats the runner-up.
Editing question | Weak answer | Stronger answer |
|---|---|---|
Why keep this frame? | Because the moment felt exciting | Because the image is visually clearer than the alternatives |
Why reject this one? | It is almost the same | Its overlap, edge, or timing is weaker |
Should I crop? | Only if rules allow it | If cropping improves hierarchy without breaking the picture |
Should I process more? | To make it dramatic | Only if it improves readability and emphasis |
Where can you find copyright-free or reusable photographs for teaching examples?
The safest answer is to prefer your own photographs or other images with clearly documented status. For supporting educational examples, the supplied research points to Library of Congress Free to Use and Reuse sets and the National Gallery of Art's Open Access material as strong sources for rights-cleared or public-domain imagery. Wikimedia Commons can also be useful, but its licensing is mixed, so each file still needs individual verification rather than assumption.
It is also worth using careful language. 'Copyright free' is often used loosely. In practice, sources may describe material as public domain, no known copyright restrictions, or open access under stated terms. Those labels are not identical, and the Library of Congress specifically notes that users remain responsible for assessing rights and other restrictions. So the teaching lesson is not just where to look, but how to verify what you found.
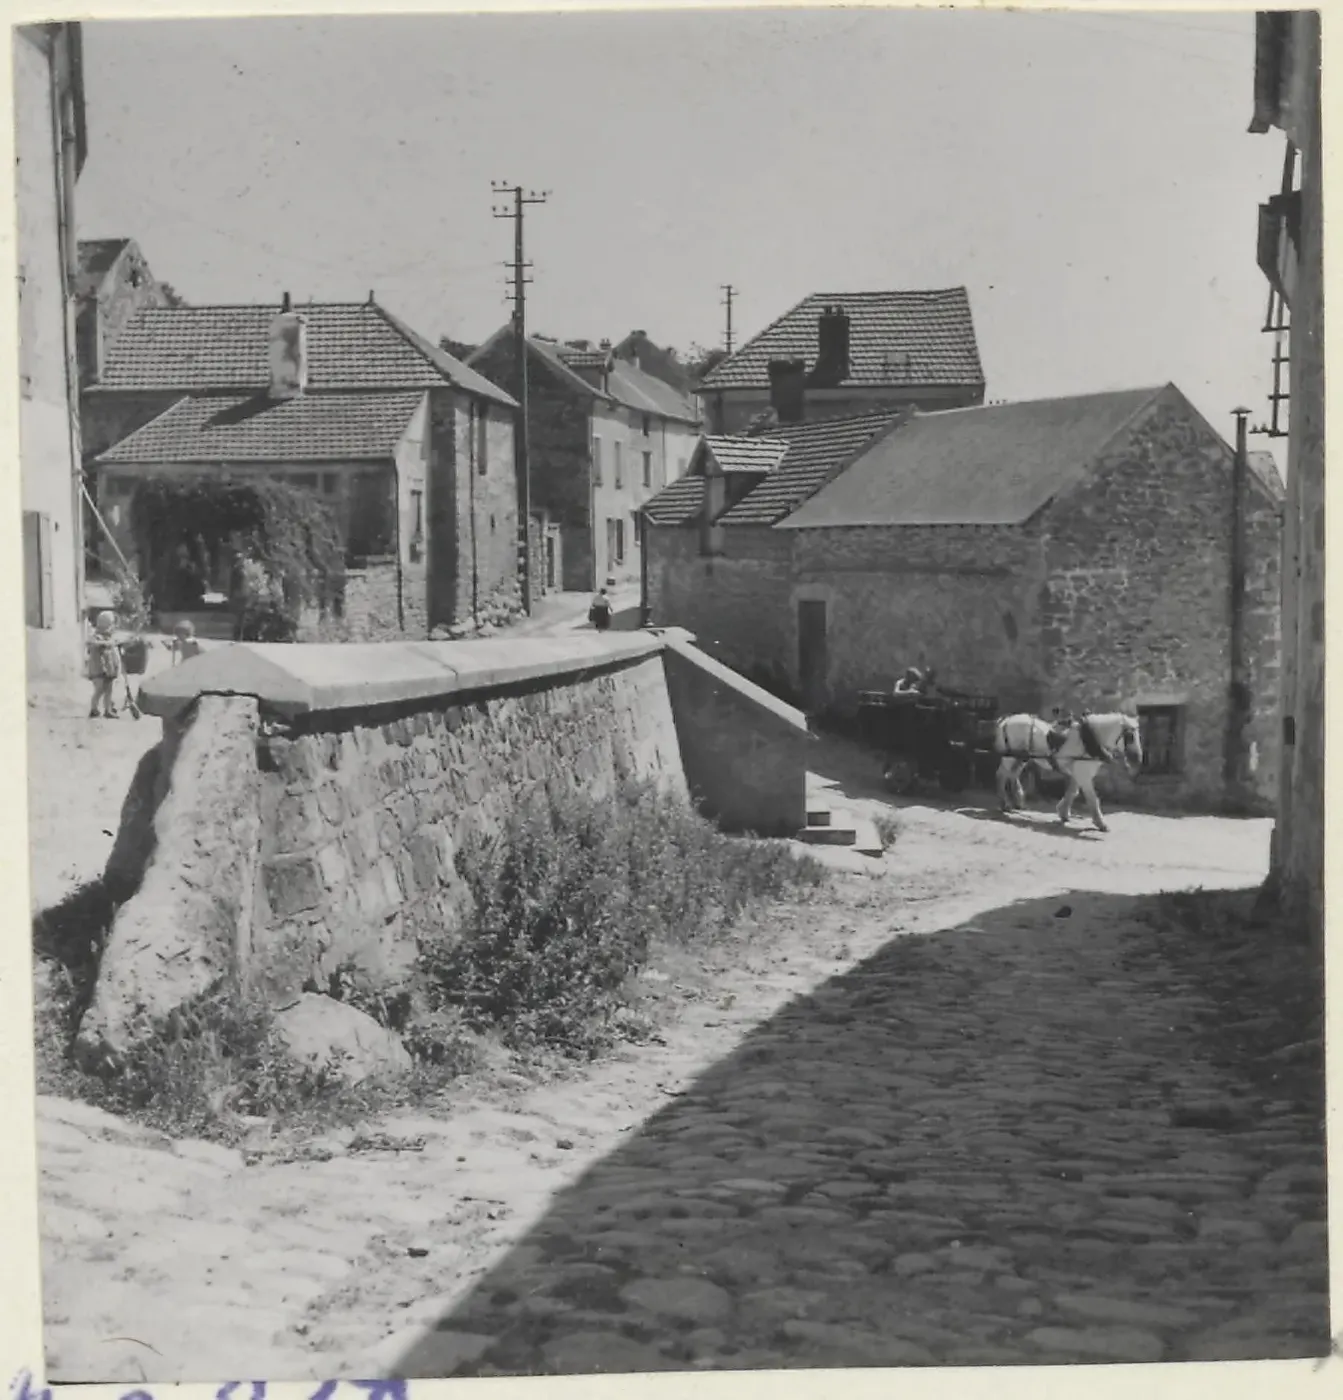
For this article, the supplied example images are useful mainly as public or historical street scenes that show visible structure, grouping, roads, buildings, and light. They can support discussion of openness, repeated routes, and light-driven composition, but they do not prove contemporary ethical norms or substitute for a modern street-photography legal guide.
Prefer your own photographs first.
Check the exact status of every external file.
Do not treat Wikimedia Commons as a single license type.
Remember that copyright status is not the same as privacy or publicity clearance.
Source type | Why it is useful | What to verify |
|---|---|---|
Your own images | Best control and clearest provenance | Your intended use and subject sensitivities |
Library of Congress Free to Use and Reuse | Strong source for rights-friendly material | Any remaining restrictions or context |
National Gallery Open Access | Large public-domain/open-access collection | Terms for the specific asset |
Wikimedia Commons | Good discovery tool | Per-file license and attribution needs |
How can you practice all five non-negotiables on one street corner this week?
Try this exercise: choose one intersection or one short block and commit to it for a week. Visit at three different times of day on at least three separate days. Work openly. If someone objects, disengage and move on. During each session, make a manageable set of frames rather than spraying constantly. The point is to observe patterns, not to rely on volume alone.
Start each session by studying the place before raising the camera much. Where does light fall cleanly? Where do people pause, queue, cross, or emerge from shadow? Which backgrounds are calm enough to separate a figure? Make notes if that helps. Then build frames around those conditions and wait for gestures or spacing that complete them.
After each session, sort your photographs into four groups: best example of respectful presence, best use of light, best composition, and best overall picture. Then compare the winner in each group with the closest runner-up. Write one sentence naming the actual difference: cleaner edge, better gesture, more separation, stronger silhouette, less overlap, or clearer hierarchy. This is critique as diagnosis, not self-punishment.
If the exercise works, you should notice a few things by the end of the week. Repeated visits usually reveal patterns you missed on day one. Better light often matters more than a more dramatic subject. A one-step position change can simplify a busy scene surprisingly well. And hard editing will usually remove some frames that felt thrilling in the moment but do not quite resolve as photographs. Those observations are exactly the point.
Pick one short route or corner.
Visit in morning, midday, and late afternoon.
Work openly and disengage if challenged.
Photograph patterns, not just isolated surprises.
Edit by comparing neighboring frames, not by rating single images in isolation.
Exercise step | What to do | What to observe |
|---|---|---|
Choose location | One corner or short block | Where people and light repeat |
Shoot repeated sessions | Three times of day across a week | How timing changes the scene |
Build frames from conditions | Wait in good light or strong structure | How anticipation beats random wandering |
Edit comparatively | Compare winner and runner-up | What tiny differences change the picture |
Street photography gets better when you make it less random and more intentional. If you want to keep building from here, Miru's lessons on composition, critique, and studying great photographers can help you turn these five non-negotiables into a repeatable practice, or you can try a Happy Miru critique to see where your own street frames are already strong and where they still leak attention.
Sources and further reading
Do I need permission to use an image from your site? - Ask a Librarian
https://store.moma.org/products/the-photographers-eye-paperback
https://opportunities.nppa.org/opportunities/independent-photographer-award-2026-street-photography/
https://www.moma.org/momaorg/shared/pdfs/docs/learn/courses/Szarkowski_1966_Photographers_Eye.pdf
https://commons.wikimedia.org/wiki/Category%3AStreet_photography
https://www.nga.gov/national-gallery-art-wikimedia-commons-and-wikidata
https://commons.wikimedia.org/wiki/Category%3AStreet_photographers
https://commons.wikimedia.org/wiki/Category%3AStreet_photography_by_photographer
https://commons.wikimedia.org/wiki/Category%3AStreet_photographers_%28trade%29
https://commons.wikimedia.org/wiki/Category%3AStreet_photography_in_the_2020s