How to Take Better Sunset Photos
Strong sunset photos come from two things: giving the frame a clear subject or structure, and controlling the big brightness difference between the sky and the foreground. A colorful sunset helps, but it usually is not enough on its own.
TL;DR
A beautiful sky does not automatically make a strong photograph; the frame still needs a clear subject or visual idea.
Sunset scenes are hard because the sky is often much brighter than the land, so exposure becomes a tradeoff.
If you are making one exposure, protect highlights in the sky first; bracket or use a graduated ND filter when foreground detail matters.
Arrive early, choose composition before peak color, and keep shooting into civil twilight after the sun drops below the horizon.
Foregrounds, silhouettes, reflections, layers, and negative space usually make sunset images feel more intentional.
White balance is partly technical and partly expressive; warmer is not always better, just different.
To make a sunset photo look intentional rather than like a flat snapshot, do not rely on the sky alone. The most reliable approach is to decide what the picture is about, compose before the best color arrives, and manage the large brightness difference between the sky and the foreground by protecting highlights, embracing silhouette, bracketing exposures, or using a graduated ND filter when the scene suits it.
That answer is more useful than any universal sunset preset because the main problem is not finding orange light. It is turning a visually impressive moment into a photograph with clear hierarchy. In person, a sunset can feel dramatic because of scale, atmosphere, and memory. In a still image, those extras disappear unless the frame gives the viewer something specific to notice: a silhouette, a reflection, layered depth, a small figure for scale, or a strong use of empty space.
Technically, sunsets are difficult because bright sky and darker foreground often exceed what one exposure can hold cleanly. Practically, that means you should expect to make choices. Sometimes the best answer is a dark foreground silhouette. Sometimes it is a bracketed series. Sometimes a graduated neutral density filter helps if the horizon is simple enough. And often, some of the best light arrives after the visible sunset, during civil twilight, when color can remain strong and contrast may become easier to manage.
Allan Robbins — CC BY-SA 4.0. Resized and compressed to WebP; visual content unchanged. Original image. License.
Why do sunset photos often look flat even when the sky was beautiful?
Because the sunset itself is usually only the raw material, not the finished photograph. A colorful sky is an interesting subject, but that does not automatically create a compelling image. If the frame contains nothing but generalized color and no clear visual structure, the result often feels descriptive rather than intentional.
In practical terms, sunset photos tend to get stronger when the sky is supporting another idea. That idea might be a silhouette with a readable shape, a reflection that echoes the sky, a foreground that gives scale, or a layered landscape that leads the eye from near to far. This is partly artistic judgment, but it is also grounded in common compositional logic: the viewer needs a reason to stay with the picture after the first hit of color.
A useful question in the field is not just What a beautiful sunset, but What is actually happening visually here? If you cannot answer that beyond nice color, keep working. Move, wait, simplify, or look for a clearer relationship between sky and subject.
Weak sunset photo: sky color is the only event.
Stronger sunset photo: sky color supports shape, scale, reflection, rhythm, solitude, or depth.
The goal is not to include everything; it is to make the most important idea clear.
Common problem | Why it feels weak | Better direction |
|---|---|---|
Only a colorful sky | No clear subject or structure | Add silhouette, reflection, or layered depth |
Too much unrelated foreground | The eye has no hierarchy | Simplify and decide what the photo is about |
Everything exposed equally | The image feels literal and flat | Let some areas fall dark if that serves the idea |
What makes sunset photography technically difficult?
The core technical problem is dynamic range: the sky near sunset is often much brighter than the land, water, buildings, or people beneath it. If you expose broadly for the darker foreground, the brightest sky can lose detail. If you expose for the sky, the foreground may go very dark. That is not a sign that you are doing something wrong; it is often the normal optical challenge of the scene.
This is why generic advice such as use sunset settings is unreliable. There is no single correct combination of shutter speed, aperture, and ISO for all sunset photographs, because the real decision is tonal priority. What matters more is whether your chosen exposure protects the part of the image you care about most, and whether the scene requires a single-frame compromise, a bracketed sequence, or a filter-based solution.
One practical consequence is that preserving highlight detail in the sky is often the safer choice for a single exposure. Once highlights are clipped, recovery is limited. Darker foreground tones that are still intact usually leave you more options than a blown-out sky with missing color and structure.
Expect a tradeoff between sky detail and foreground detail.
Do not judge exposure only by overall brightness; judge it by what important detail is being protected.
A technically difficult sunset is normal, not exceptional.
Scene condition | Typical risk | Likely response |
|---|---|---|
Bright sky, dark land | Sky blows out or land goes black | Expose for sky, accept silhouette or bracket |
Simple horizon at sea or plain | Top of frame much brighter than bottom | Consider a graduated ND filter |
Irregular skyline with trees or buildings | Uneven transition is hard to control | Bracketing is often more flexible |
How do you choose what a sunset photo is actually about?
Start by naming the visible subject and the emotional center separately. The visible subject may be a shoreline, a pier, a mountain ridge, a person, or a tree. The emotional center may be solitude, scale, stillness, heat, distance, or calm. Once you know those two things, decisions about framing and exposure become clearer.
For example, if the photo is about a lone person against a glowing sky, deep foreground detail may not matter much; a clean silhouette may be stronger. If the photo is about the landscape receding into layers, then preserving tonal separation between foreground, middle ground, and horizon becomes more important. If the photo is about reflection, then the shape and placement of the reflected light may matter more than the visible sun itself.
This matters because many weak sunset frames contain competing photographs. You may have dramatic clouds, a bright horizon, a cluttered foreground, a boat at one edge, and a person on the other. Each element may be interesting, but not all of them belong in the same final frame. Stronger photographs usually make fewer, clearer claims.
Ask: What is the visible subject?
Ask: What carries the feeling?
Ask: Which parts of the frame support that idea, and which parts merely came along for the ride?
Possible intention | What should lead | What can be sacrificed |
|---|---|---|
Silhouette | Readable shape against bright sky | Most interior foreground detail |
Reflection study | Placement and symmetry of reflected tones | Extra sky or shoreline clutter |
Layered landscape | Separation between planes | Unnecessary empty foreground |
Minimalist sky composition | Small subject against large field | Literal detail everywhere else |
Why is composition more important than waiting for color alone?
Because peak color passes quickly, while poor composition usually stays poor. Practical sunset guidance recommends finding your composition before the best light arrives, including foreground interest or lead-in lines where useful. That is less glamorous than chasing the brightest orange moment, but it is often what separates a strong frame from an ordinary one.
Arriving early gives you time to test alternatives: a wider frame with more environment, a lower angle that makes the reflection stronger, a cleaner silhouette against open sky, or a tighter crop that removes dead foreground. It also gives you time to check edges, since small bright scraps and awkward mergers become very noticeable in scenes with large smooth areas of sky.
This is also where artistic judgment enters clearly. A foreground element is not automatically helpful just because landscape advice often recommends one. A rock, fence, dune, or pier should stay only if it gives scale, direction, balance, or mood. If it merely fills space, it is clutter, not composition.
Choose the frame before the sky reaches its best color.
Work the edges as carefully as the center.
Keep a foreground only if it has a job.
Compositional choice | Useful when | Risk if handled badly |
|---|---|---|
Foreground anchor | You need scale or a path into the frame | It becomes dead weight |
Silhouette subject | The shape is clean and recognizable | The outline merges into clutter |
Large sky / negative space | You want calm, scale, or isolation | The image feels empty rather than intentional |
How should you expose a sunset without blowing out the sky?
If you are making a single exposure, the safest starting point is usually to protect the brightest important part of the sky, then decide how dark the rest of the frame can reasonably become. This approach is well supported by the basic problem of sunset dynamic range and by the practical limit that clipped highlights are difficult to recover later.
Use a low ISO where practical, make test frames, and review the result rather than assuming the first exposure is close enough. Light changes quickly at sunset, so exposure that looked right two minutes ago may already be too bright or too dark. Bracketing can be useful not only for blending, but also as insurance while the scene changes faster than your judgment can keep up.
Avoid looking for one magic aperture. Aperture should follow intent. In many landscape-style sunset images, you may want enough depth of field to keep the scene legible. In a telephoto silhouette or a more isolated subject treatment, a different aperture may make more sense. The key lesson is not the number itself, but why that number serves the picture.
Single frame: bias toward protecting sky highlights.
Recheck exposure often because the light changes fast.
Choose aperture by intent, not by sunset folklore.
Exposure priority | What it preserves | Tradeoff |
|---|---|---|
Highlight protection | Sky color and bright-cloud detail | Foreground may go dark |
Midtone compromise | More even overall brightness | Sky may lose punch or clip |
Foreground priority | Land or subject detail | Sky can wash out |
When should you use bracketing or a graduated ND filter?
Use bracketing when you want foreground detail but the scene is too contrasty for one clean exposure, or when the horizon is irregular enough that a filter transition would become obvious. A bracketed sequence gives you multiple exposures of the same composition, which can be compared, selected from, or blended later if that matches your workflow.
A graduated neutral density filter is most useful when the top of the frame is brighter than the bottom and the dividing line is relatively simple, such as sea, plain, or distant hills. In that situation, a GND can darken the sky portion in capture and reduce the difference between sky and foreground before the light ever reaches the sensor.
The limitation is equally important. With trees, buildings, jagged mountains, or other irregular skylines, the filter transition may darken parts of the subject awkwardly. That does not make GND filters bad; it just means they are scene-dependent tools, not universal sunset gear.
Bracket when detail matters across the whole frame.
Use a GND when the horizon is simple enough for a clean transition.
Treat both as tools, not requirements.
Tool | Best use case | Main limitation |
|---|---|---|
Bracketing | High-contrast scene with complex skyline | Requires multiple frames or later selection/blending |
Graduated ND filter | Bright sky over simple horizon | Awkward on trees, buildings, or uneven ridgelines |
Why should you keep shooting after the sun has gone below the horizon?
Because sunset is not the end of the useful light. Evening civil twilight continues after sunset until the sun's center is 6 degrees below the horizon. That definition matters photographically because it confirms that the shooting window extends beyond the visible sun touching the horizon.
In practice, many photographers find that the minutes after sunset can be more manageable than the obvious peak moment. This is a practical inference rather than a guaranteed rule, but it is often true that sky color remains strong while the contrast between sky and foreground becomes easier to handle. The exact timing depends on weather, cloud cover, season, and latitude.
The deeper lesson is patience. If you stop at the most obvious moment, you may miss the frame where color becomes subtler, silhouettes become cleaner, or reflected light becomes more balanced. Sunset photography rewards staying longer than casual viewers do.
Do not pack up at the moment of sunset.
Keep watching for changes in color, contrast, and reflection.
Treat civil twilight as part of the session, not an afterthought.
Stage | What often changes | Photographic opportunity |
|---|---|---|
Before sunset | High contrast, strong direction of light | Silhouettes, dramatic clouds |
At visible sunset | Peak obvious color, bright horizon | Graphic compositions |
Civil twilight | Softer contrast, lingering color | More balanced landscapes and reflections |

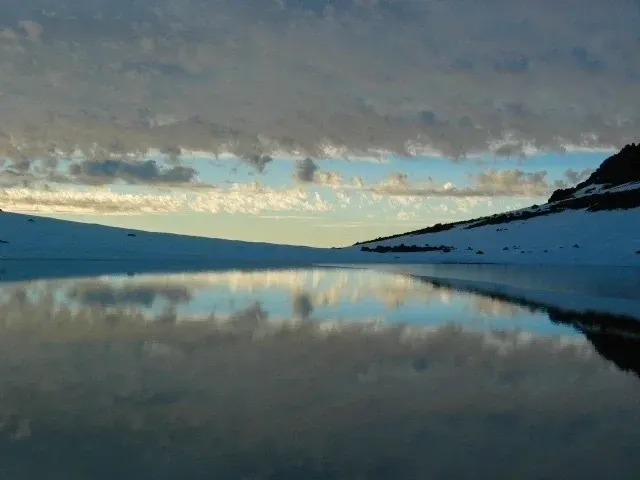
A post-sunset scene can rely on atmosphere, silhouette, and sparse points of light rather than intense color alone. Vladimir Grinberg — Public domain. Resized and compressed to WebP; visual content unchanged. Original image.
How does white balance change the mood of a sunset photo?
White balance changes how the camera renders color under the light that is present. That is a technical fact, not just an editing preference. In sunset photography, white balance strongly affects whether the scene feels fiery, neutral, delicate, or cool.
What it does not provide is a single correct answer. A warmer rendering often emphasizes drama and the familiar golden-orange expectation of sunset. A cooler or more neutral rendering may preserve subtle color separation in dusk clouds, water, or distant haze. Neither choice is universally right; each supports a different interpretation of the same light.
For serious amateurs, the useful habit is to ask what the color should do in the picture. Should it dominate? Should it feel restrained? Should it support a silhouette without becoming the whole point? That question is more valuable than chasing the warmest possible file every time.
White balance is both technical and expressive.
Warmer is often stronger for drama, but not always for subtlety.
Choose color rendering to support the picture's purpose.
White balance direction | Common effect | Best when |
|---|---|---|
Warmer | More orange and red emphasis | You want drama and heat |
More neutral | Less exaggerated warmth | You want believable separation and restraint |
Cooler | Stronger dusk or twilight feel | You want moodier, quieter color |

Color treatment changes how a sunset or twilight scene feels: intense warm-violet harmonies create a much more dramatic mood than a restrained rendering would. Konstantin Bogaevsky — Public domain. Resized and compressed to WebP; visual content unchanged. Original image.
How does camera position change silhouette, layering, and edge control at sunset?
Small position changes matter enormously at sunset because bright backgrounds make shape relationships very easy to read. One step left may separate a person from a post. Lowering the camera may place a tree fully against open sky instead of merging it into a darker hill. Moving closer may enlarge a foreground reflection enough to become a real compositional element.
This is especially important for silhouettes. A silhouette works when the outline is legible. If two figures overlap awkwardly, if a pier cuts through a body, or if the horizon slices through the wrong part of the subject, the shape becomes confusing and loses force. Sunset light is graphic, so silhouette readability depends more on spacing than on technical settings alone.
The same logic applies to layers and edges. A clean strip of sky between two dark shapes can create depth. A distracting bright fragment near the corner can damage an otherwise calm image. Sunset scenes often look simple, but they are unforgiving about small compositional errors.
Move before you zoom.
Judge silhouettes by outline clarity, not just drama.
Scan the edges; quiet scenes make small distractions louder.
Position change | Possible gain | What to watch for |
|---|---|---|
Step left or right | Cleaner separation between shapes | New mergers at frame edges |
Lower camera | Subject isolates against sky | Horizon may cut awkwardly |
Move forward or back | Better foreground scale or reflection size | Foreground may start to dominate |
How can you compare similar frames to see which sunset photo is strongest?
Comparison is one of the fastest ways to improve sunset photography because near-identical frames reveal what actually matters. A slightly darker version may hold the sky together better. A frame made two minutes later may have cleaner color. A small shift in camera position may separate the subject from the horizon. These differences are often invisible while shooting but obvious in review.
When comparing, ask a few specific questions. What does the eye notice first? Is that the right thing? Does the foreground support the image or merely occupy space? Are the silhouette shapes readable? Does the sky still contain structure, or has it turned into bright emptiness? Which version makes the picture's purpose easiest to feel?
This kind of review is useful because it shifts the standard from I remember the sunset being beautiful to this frame works better as a photograph. That distinction is where a lot of serious improvement begins.
Compare frames made minutes apart, not just obviously different compositions.
Judge by clarity, hierarchy, and shape, not by memory of the moment.
Keep the version that makes the idea easiest to understand.
Review question | Weak answer looks like | Strong answer looks like |
|---|---|---|
What matters first? | The eye bounces around | The eye lands where you intended |
Does the foreground help? | It fills space without purpose | It gives scale, direction, or mood |
Is the sky controlled? | Highlights feel empty or washed out | Color and cloud structure remain readable |
What practical exercise will teach you to make more intentional sunset photos?
Try one sunset, four intentions. Stay in one general location and make four clearly different versions of the same scene. This exercise is useful because it forces you to make decisions instead of hoping one pleasant frame will solve everything.
Version 1: silhouette. Suggested approach: expose for the brightest important part of the sky and let the foreground go dark if needed. Look for a subject with a clean outline such as a person, tree, pier, or roofline. Compare later whether the shape reads instantly or gets lost.
Version 2: foreground-led. Suggested approach: include one foreground element that gives scale or a path into the frame, such as a rock, shoreline, fence, or plant. Then make a second frame without it. Compare whether the foreground adds structure or merely adds clutter.
Version 3: negative-space frame. Suggested approach: make the main subject small against a large field of sky or reflected light. Compare whether the extra space creates calm, scale, or solitude, or whether it simply weakens the image.
Version 4: twilight follow-up. Suggested approach: keep shooting roughly 15 to 25 minutes after sunset, understanding that this timing is only a starting suggestion, not a universal rule. Compare whether the later frame gives you better color relationships, easier tonal control, or a more atmospheric result.
Optional Version 5: bracketed set. If foreground detail matters, make a small bracketed sequence of the same composition. Then compare the single exposure with the bracketed result. The point is not to prove that bracketing is always better, but to see whether your scene actually needed it.
Afterward, review all versions side by side and write one sentence for each: This photo is about ____. If that sentence is hard to write, the frame may still be depending too much on the sunset itself and not enough on a clear photographic idea.
Photograph one scene multiple ways instead of chasing only the obvious view.
Use the exercise to compare intention, not just prettiness.
Treat the suggested approaches as exercises, not universal settings.
Exercise version | Suggested approach | What to compare later |
|---|---|---|
Silhouette | Protect bright sky; seek a clean outline | Does the shape read instantly? |
Foreground-led | Add one scale-giving foreground element | Does it help or clutter? |
Negative space | Make subject small in a large field | Does the space create mood or emptiness? |
Twilight follow-up | Keep shooting after sunset | Is color or contrast stronger later? |
A better sunset photo usually comes from clearer choices, not from luck or a fixed recipe. If you want to keep improving, compare similar frames, pay attention to what the sky is doing to the rest of the composition, and practice deciding what the picture is about before the color peaks. If you want help judging those decisions, a Happy Miru critique can be a useful next step.
Sources and further reading
https://www.adobe.com/au/creativecloud/photography/discover/nd-filter-photography.html
https://helpx.adobe.com/ph_fil/lightroom-cc/how-to/enhance-sunset-photo.html